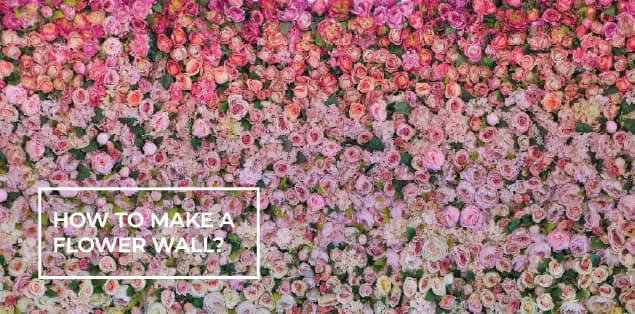
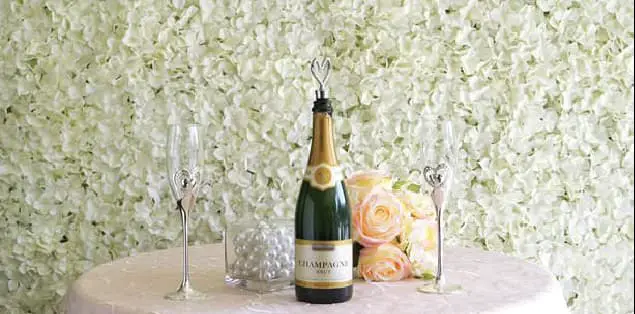
So, how to make a flower wall? Flowers are attached to wire mesh panels to create an artificial flower wall, which is a form of the backdrop. People frequently use floral walls to demarcate areas during events, such as weddings or celebrations, or as a decorative backdrop for pictures.
As an alternative to traditional feature walls, flower walls can bring interest, color, and texture to any area in the house. This article will discuss how you can make a flower wall.
How to Make a DIY Flower Wall Backdrop?

Paper and artificial flower wall backdrops are perfect for home decor, product launches, birthday parties, weddings, hens nights, baby showers, formals, balls, etc. Follow these steps to build a flower wall backdrop:
PVC-Based Pipe Stand
- You can attach flowers to the pipe using hot glue or wire.
- You can use sheets or inexpensive curtains to cover the pipe, including loops or a sewed pocket to sheer to the pipe. Accent displays can benefit from flowers on the corners or over the top.
- You’ll need canvas or calico, which you can get by the meter at spotlight or a fabric store, to make a floral fabric wall.
- If the flowers have a wire hanger on the back, you can pin them to the cloth instead of using hot glue to attach them.
- You can hide the PVC pipes by gluing them to foam core boards and hanging them from them.
Making a Stand Out of PVC pipes
You can get the parts to build two DIY stands at your local hardware store. However, if you are not the construction type, you can get them on Etsy pre-cut and ready to assemble. For example, you may purchase PVC pipe from your local Bunnings store and have it cut to the precise length you require.
PVC Pipe Inventory
You can do all of this with PVC plumbing pipes, so go to the plumbing section of your hardware store, like Bunnings.
- Six pieces of PVC pipe that are 90 cm long.
- Six pieces of 30cm-long PVC pipe.
- Four pieces of 120cm-long PVC pipe.
- 6 Tee connectors for women
- 6 x PVC caps
- 2 elbow adapters for women
- 1 × equal cross connector
Building A Plywood Chalkboard Backdrop
You require power tools and some experience in the construction of plywood walls. East Coast Creative has resources and instructions. For example, instead of grass, paint chipboard with chalkboard paint. Support the weight of the flowers with *weights/sandbags strapped on your back.
You Can Use Polystyrene Sheets to Build
A polystyrene backdrop is much lighter and easier to put together. Here, you can get all the building materials and instructions. For example, how to Set Up a Scene. After putting the board together, you can paint it. Polystyrene is much lighter than plywood, so you must use weights or sandbags.
Putting Your Flowers in the Background
There are a few ways to attach the flowers to the background. To create a floral arrangement, you must know how to use wire to adhere paper flowers to a foam board. Then use zip ties to adhere the foam boards to your background. Your flower wall backdrop is ready to use
How to Make a Portable Flower Wall?
You can make a flower wall and a professional floral backdrop that folds in half for storage with just a few mentioned supplies and equipment.
Materials Required
- Two 80-by-40-inch sheets of plywood
- You’ll need three 3- to 5-inch door hinges
- A sufficient number of 12–34-inch screws (depending on the thickness of the plywood) to hold all of the hinges in place
- Four 40-inch-by-40-inch panels of fake boxwood
- Decorate with loose flowers or pre-made swags.
Tools Required
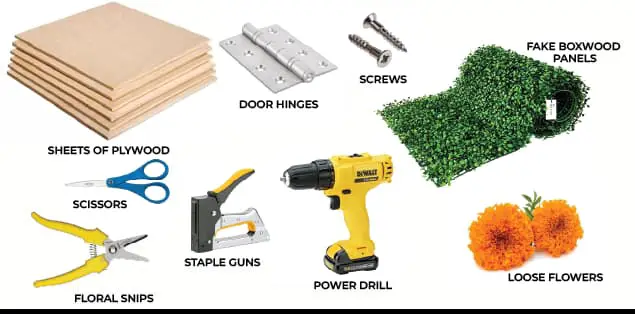
- Power drill fitted with a screwdriver bit
- Staple gun
- Scissors
- Floral snips
Step 1: Gather project materials
First, get faux boxwood panels (roughly $45 per 40in x 40in a square panel on Amazon; mine have a plastic grid on the back and a lifelike carpet of tiny leaves on the front).
While you wait, buy plywood, hinges, screws, and staples if needed.
Step 2: Assemble the flower wall.
Place two plywood boards on the floor so that the long sides touch. One hinge is in the middle, another is near the top, and the last one is near the bottom.
Drill and screws secure each hinge and fold both boards toward you like a huge book.
Once you’re satisfied that the backdrop folds properly, flip it over, so the hinges face the ground. For example, if your plywood was just a half-inch thick and your screws were longer, the tips might poke through. The spongy boxwood panels will cover them. Use wire snips to prevent unintentional contact if they protrude more than 1/2 inch. Unroll faux boxwood squares and cover the structure’s back. Each board should fit two panels, which will hide the crack where the hinges joined them.
Staple the panels to the boards. Check for sagging or peeling, and cut any boxwood sheet that overhangs the plywood by more than 1 inch.
If constructing your flower wall background sounds too demanding, you may buy one that contains Oasis foam.
Step 3: Create a Floral Backdrop by adding fake flowers
Allow your flower stems from growing while processing them. Then, take advantage of the net-like structure of the boxwood panel design by punching loose flowers into the boxwood backdrop as if threading them into a chicken wire vase. It’s a secure mechanic, but removing all the flowers after the event takes some work. For example, you create floral garlands or chicken wire constructions to staple or wire onto the backdrop. You must secure the floral elements to the wood.
Step 4: Set Up the flower wall Backdrop
For a wedding flower wall backdrop or any other event, leans the two flower panels structure against a wall with a light touch. If you want it to stand on its own, you can use a nut-and-bolt system to attach some simple triangular trusses to the back outer edge of each board. To add trusses, you will need to drill holes in the plywood. However, the boxwood layer will conceal them and allow easy assembly/disassembly when packing it up and laying the sections flat after an event.
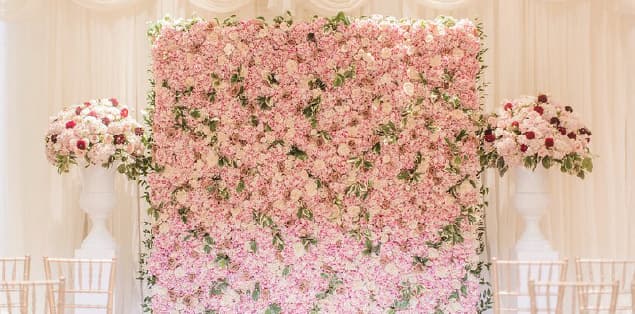
Flower Wall Color Ideas
Using your bridal flower wall as a brilliant splash of color is a terrific idea. The various shades of roses for decorations do a stunning job of illuminating any room.
The wedding backdrop florals wall is ideal for a spring wedding if you adore pastel colors.
Modernize flower decorations with an ombre effect. This gorgeous ombre trend has been “in” for a few years.
How to Make a Flower Wall for Bedroom?
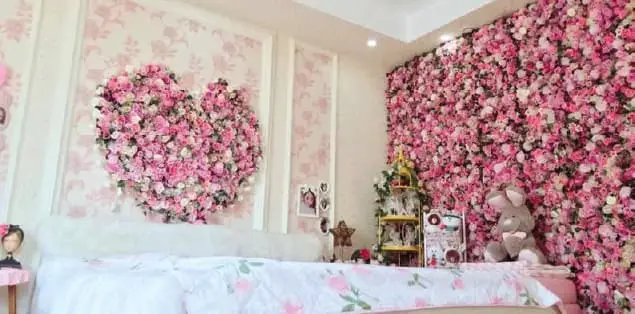
Tape, scissors, and artificial flowers are the only things you need to recreate this look in your bedroom, and it’s much simpler than you may think.
Start by removing any excess stems from the blooms. Make individual stalks out of the bouquets if you want a cleaner look. This is critical if you want to achieve the desired look.
After that, all you need to do is stick them to your wall. That is the concluding statement! It is so simple that even a child could carry it out.
Unless it’s an industrial packaging tape, the clear tape might not stick particularly well to walls. So if you’re going for a more quirky look, you might want to try using craft tape or colored washing tape.
After a week, a flower wall will wilt, using artificial flowers or preserved dried flowers for something more durable.
Flowers can be arranged randomly, in lines, or alternate spaces. Whatever you choose, leave even gaps, so the effect isn’t untidy.
Hang your flowers from wooden racks on your wall for a more modern look.
How Do You Hang Flowers On a Wall?
You can hang flowers on a wall in a variety of ways. Consider using a floral backdrop, such as a garland of flowers, floating flowers, or hanging flower baskets. However, this undertaking is a cinch. We attached the flowers to a detachable board using temporary command strips. It doesn’t take much effort to change things up for the seasons! So let’s now look at how to create a wall hanging flowers.
How to Make a Hanging Flower Wall?
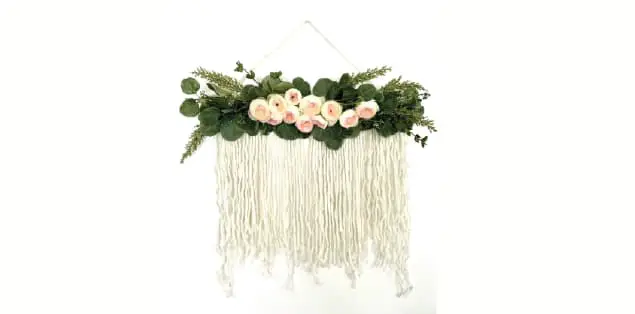
You can use Faux flowers for creating this simple DIY Flower Wall Hanging. It’s ideal for wedding backdrop, bride photos, dorm rooms, offices, birthdays, or other special events.
Material required for hanging flower walls
- Faux Flowers – Pink Roses, Pink Peonies (but use whatever flowers you love)
- Foam Core Board (mine is 17″x27″)
- Wire Cutters to Cut Stems
- Glue Gun
- Velcro Command Strips
Instructions for wall hanging:
- Get your foam board ready.
- Figure out how big you want your flower to be. For foam board is 17″ x 27″, and we used about 125 roses and 20 peonies to make it.
- Cut stems.
- About an inch of the peony stem was left. Also, the roses you bought didn’t have stems, so you don’t need to cut them.
- Arrange peonies.
- First, put the larger artificial peonies around the board. Punch a hole with the stem and push it through the foam core. They can be hot-glued or left alone. left while securely on the board
- Begin gluing your foam roses.
- This is how the roses came. This bag contains 100 foam flowers, which don’t look half terrible in person.
- The first layer on the board, then a couple here and there for a second layer. The occasional second layer provided more visual depth.
- Attach velcro strips.
- Vertically position your strips on the back of your foam core board. Then hang it on the wall, line it up with a pencil, and attach the other velcro. When both sets of strips are complete, attach the flower wall hanging.
How to Make a Silk Flower Wall?
Create a Background
You can use silk flowers instead of flowery wallpaper or stencils to create a faux wallpaper look in a room. Silk flowers look great on the wall behind the bed. If you want a clean aesthetic, hang your flowers stem-to-bloom so that they form straight lines on the wall. Depending on your preference, you can use a staple gun or hook-and-loop tape to affix the flowers to the wall.
Make the Border
For a more ornamental look, paint a small line in a contrasting color to arrange the flowers over. Flowers complement the look of mint and sage quite well. You can either attach the blooms stem-to-bud or use a silk flowering vine to simplify the installation process.
Shadowboxes
Shadow boxes are great for displaying three-dimensional things. Silk flowers in shadowbox frames make lovely wall hangings. For a finished look, bundle the flowers with a ribbon. If you prefer a more casual look, lay the flowers loosely inside the box and fill as much of the frame as possible. Fill the box with flowers in one or two hues.
Mural embellishment
A flower-inspired painting can complete a garden-themed room. Create the illusion of depth in the mural by using silk flowers. Silk flowers stapled to the mural’s wall add texture and complexity. Put picket fencing as part of the mural for a spectacular impact and have silk flowers peering over the fence.
Cost
A DIY flower wall should be relatively cost-effective with plywood, a staple gun, and imitation flowers. On the other hand, renting a floral wall is a very tight budget.
Final Words
Flower walls are very beautiful for almost every setting. Here are some essentials for your flower wall. Boxwood panels are available at hardware stores and online. You’ll need the following for creating your flower wall:
- Real or fake flowers with stems that are at least 3 inches long
- Wire mesh (the size will depend on how big you want the wall to be)
- Garden wire
- Wall hanger
On the other hand, Faux flowers can be purchased in bulk for less money and stay far longer than genuine flowers, as previously indicated.
To summarize, the steps for making a flower wall are:
- Arrange the flowers so that they are all in heaps of the same color. This will allow you to distribute them evenly as you construct your flower wall.
- You can use garden wire to anchor each bloom to the metal mesh panel as you work your way around.
- Make sure to change the colors as you work your way in to create a natural blend of colors.
- Finally, fix the back of the panel with a hook or nail so that you may attach it to the wall or rail (depending on where you want your flower walls to go).
This was a complete guide on making an artificial flower wall backdrop and how to make your own flower wall.